Momentum in Atlas Fallen can build up by successfully striking and defeating your enemies. As your Momentum grows, so does the power of your attacks, but it also means you become more vulnerable to incoming damage. It's important to note that Momentum is not a permanent effect and will eventually wear off if you don't keep engaging with foes. This gameplay mechanic, along with the Ascending mechanic, works together to enhance the sense of fluidity in the game. This page will cover information on both basic and advanced tips regarding Momentum.

Atlas Fallen Review

Atlas Fallen Review - Is it Worth it?


Atlas Fallen Gameplay Impressions

Hands-On Impressions - Action Role Playing Game


Atlas Fallen Momentum Guide Quick Navigation

Click to jump to a specific section of the page


Atlas Fallen Momentum

About Momentum in Atlas Fallen

Momentum Gauge Upgrading

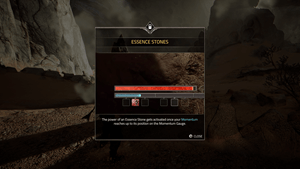
You'll discover the Essence stone sockets on the Momentum Gauge, which can be unlocked using Essence Dust. These sockets act as unique slots where you can equip potent Essence stones to enhance your character's abilities. You'll need to collect Essence Dust throughout the game to gain access to these valuable sockets and harness the power of Essence stones.

Each time you unlock a socket, the cost of unlocking the next one rises. As you continue unlocking consecutive sockets, the Essence Dust required gradually increases. As you progress through the game and gather more Essence Dust, you'll have the opportunity to unlock multiple Essence stone sockets. This allows you to customize your character's abilities further and create a unique and powerful build that suits your playstyle. 

momentum locked sockets upgrade atlas fallen wiki guide 500px

There are some Essence Stone slots in the Momentum gauge that are currently locked in ATlas Fallen once you get this mechanic. You'll need to find an Anvil and spend some Essence Dust in order to unlock these slots. Here are the costs for the locked slots for each Tier:

Tier Level Tier Slot Essence Dust Cost
Tier 1 First Slot 100 Essence Dust
Tier 1 Second Slot 485 Essence Dust
Tier 2 First Slot 1100 Essence Dust
Tier 2 Second Slot 2400 Essence Dust
Tier 3 First Slot 5350 Essence Dust


Momentum in Atlas Fallen

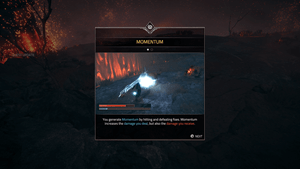
In the thrilling world of Atlas Fallen, you can create Momentum by striking down enemies and emerging victorious in battles. Momentum not only boosts the power of your attacks but also makes you more susceptible to damage. However, keep in mind that Momentum is a temporary advantage and will diminish if you stop engaging with foes for a little while.
momentum atlas fallen

This exciting game feature, combined with the Ascending mechanic, adds to the overall fluidity of the gameplay, making it a seamless and dynamic experience for players. So, harness the power of Momentum and rise to the challenge in the captivating universe of Atlas Fallen!

How does Momentum work in Atlas Fallen?

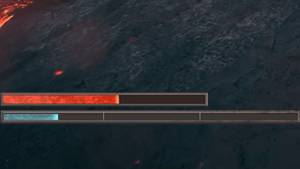
Every time you land a precise strike on your adversaries, you'll notice the Momentum Gauge starting to fill up bit by bit. As this gauge reaches higher levels, it brings with it a fantastic array of rewards, such as unlocking powerful abilities, unleashing devastating attacks, and experiencing extraordinary special effects. However, you'll also encounter a captivating risk and reward aspect in this gameplay mechanic. The more your Momentum levels surge, the more potent your weapons become, allowing you to conquer foes with even greater might.
momentum gauge atlas fallen

Nevertheless, it's crucial to be mindful that this surge in power comes at a cost, as your increased Momentum also exposes you to higher vulnerability. So, strategy and skill will play a pivotal role as you navigate the fine balance between unleashing your might and safeguarding yourself from incoming threats in the ever-engaging world of the game.


Other Mechanics of Momentum in Atlas Fallen

Ascending in Atlas Fallen

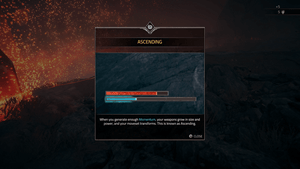
As your Momentum meter rises, something incredible happens, your combat abilities undergo a transformation. Your attacks become much stronger, enabling you to deliver powerful and devastating blows to your enemy Wraiths. But here's a downside, there's a twist to this mechanic! It works like a two-edged sword. While your damage output increases, you also become more vulnerable to your opponents' attacks.

ascending atlas fallen

And guess what? The Momentum system has even more surprises waiting for you. Once you build up enough Momentum, something truly remarkable occurs,  it's called Ascending. During Ascending, your weapons undergo a magnificent upgrade, growing larger and more powerful. Additionally, your movement becomes otherworldly, granting you unmatched agility and grace on the battlefield.

With this newfound strength and abilities, battles reach a whole new level of intensity. The choices you make during combat become even more critical because the Momentum you possess can turn the tide of the fight.

How do Essence Stones work with Momentum?

In Atlas Fallen, the Essence Stone mechanic adds an exciting dimension to your battles. The Essence Stone's power comes into play when your Momentum meter aligns with its position on the Momentum gauge. As you progress in battles and your Momentum builds up, you'll notice that the Essence Stone automatically activates once you hit a specific point on the gauge.

essence stones momentum atlas wiki guide 1080 min min

Now, here's the thrilling part - each Essence Stone you equip grants you a unique stat boost. For example, if you have a Tier One Essence Stone that increases damage, you can expect it to activate when your Momentum fills up the first section of the gauge. This means that when you reach that particular point, the Essence Stone kicks in, boosting your damage-dealing capabilities and empowering you to deal even greater havoc on your foes.

So, with careful consideration and strategic planning, the Essence Stone mechanic becomes a crucial aspect of your gameplay. Choosing the right Essence Stone and timing its activation can make a significant difference in the outcomes of your battles. Keep an eye on your Momentum gauge and the Essence Stone's position to maximize its potential and pave your way to victory! 

How does Ascending affect your weapons?

When you reach the point of ascending, get ready for a weapon change. Your weapons grow dramatically larger, bigger than ever before. As a result, your strikes become even more powerful, making your attacks devastating to enemies within a wider range. But wait, there's more to Ascending! Your movement abilities also receive a big boost. Interestingly, you can ascend not just once, not twice, but up to three times! As you master this amazing mechanic, you'll work your way to the ultimate level - the Third Ascension. At this peak, your weapons become impressively huge.

And there's more to look forward to with the Third Ascension! Your agility receives yet another thrilling upgrade. You'll move as fast as lightning, easily outmaneuvering your opponents. It's an exciting feeling to know that you have the power of three Ascensions at your command, granting you unmatched strength and agility in every battle.

weapon ascencion atlas wiki guide 1080 min min

So, practice your skills, gather your courage, and embrace the potential of Ascending. As you progress through each level of this extraordinary feature, your journey to greatness will be filled with incredible moments of growth and empowerment. Will you rise to the challenge and unlock the full potential of your Momentum? The decision is yours, and the rewards are there for those who dare to ascend beyond limits!

How does Shatter work with Momentum?

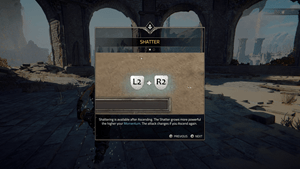
You have the option to utilize your hard-earned Momentum in a game-changing maneuver called the Shatter attack. This powerful move allows you to deal a significant amount of damage to your enemies and crystallize them in the process. However, the Shatter ability becomes accessible only after you successfully Ascend. The might of your Shatter attack is directly linked to the level of your Momentum. The higher your Momentum, the more devastating the Shatter becomes.
shatter atlas wiki guide 1080 min min

As you continue to progress and achieve additional Ascensions, the Shatter attack undergoes a remarkable transformation. Each Ascension brings about a change in the kind of attack, unlocking even more diverse and powerful abilities. When your current target can be defeated by employing the Shatter attack, a blue outline appears around their health bar, providing a clear sign that it's the perfect moment to strike with the Shatter.


Atlas Fallen Weapon Ascension and Combat Moves

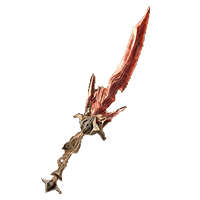
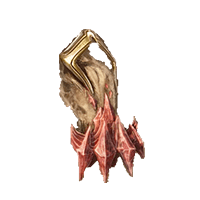
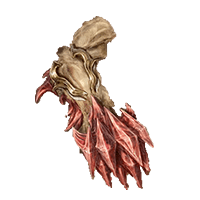
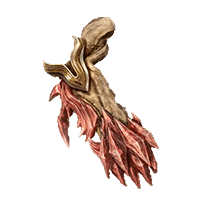
Atlas Fallen All Weapons
dunecleaver weapon atlas fallen wiki guide render 250px
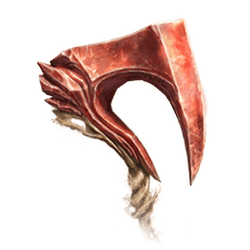
Dunecleaver

Weapon Type: Hammer and Axe

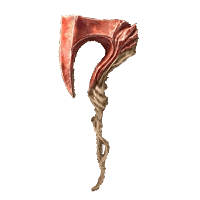
When Wraith became as large as desert hills, an equivalent force was needed to face them, The Dunecleaver shapes the sand into warhammers and blades to shatter its foes.
sandwhip weapon atlas fallen wiki guide render 250px
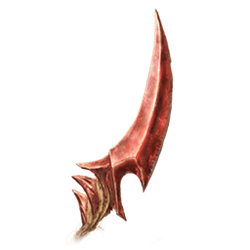
Sandwhip

Weapon Type: Whip and Sword

The whip and the sword, oppression and rebellion. The Sandwhip Shapes the sand into weapons of both the oppressed and their oppressor, in order to restore balance
knuckledust weapon atlas fallen wiki guide render 250px
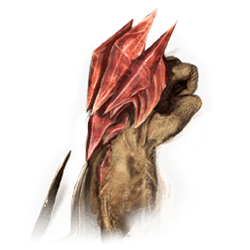
Knuckledust

Weapon Type: Fists

Sometimes all we have to defend ourselves are our bare hands. Knuckle Dust shapes sands into iron fists capable of taking down even the biggest of foes, with the right skills.


Dunecleaver
Sandwhip
Knuckledust


Dunecleaver Ascension and Combat Moves


State: Default

duncleaver default weapons atlas fallen wiki guide 200px infobox

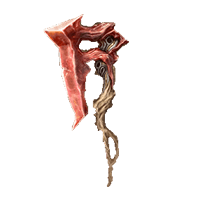
This is the default state of the Dunecleaver before Ascension. When you generate enough Momentum, your weapons grow in size and power, and your moveset transforms. This is known as Ascending.

NOTE: The input represents the status if the weapon type was equipped as the main weapon.

Dunecleaver Default Combat Moves


Cleaving Dune Combo: Regular 4-Hit combo that ends in a lateral sweep.

  • Button Combination: ▢ + ▢ + ▢ + ▢

Pounding Dune Combo: Advanced 4-hit combo with high impact and area damage, ending with a powerful zone strike.

  • Button Combination: (HOLD) ▢ + ▢ + ▢ + ▢

Swift Dune Strike: Quick hammer hit available after a dodge roll or an air dash.

  • Button Combination: After Evading,  ▢

Double Dune Strike: 2-time hammer strike with high impact, available after doing 2 or more hits from another weapon.

  • Button Combination: After two or more hits with another weapon + ▢

Dune Shatter: Strong attack which consumes accumulated momentum.

  • Button Combination: L2 + R2

Cleaving Swirl: Powerful whirlwind that brings the character in the air while damaging all nearby enemies. Requires being grounded.

  • Button Combination: R2

Dune Fracture: Dive down from the skies with a devastating slam, damage increases based on how long you fall. Requires being airborne.

  • Button Combination: R2


State: First Ascension

duncleaver first ascension weapons atlas fallen wiki guide 200px

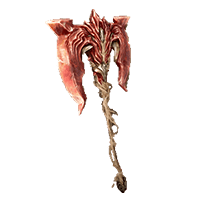
This is the First Ascension state. Generate enough Momentum during Combat to trigger the first Ascension state and your default weapon will evolve, strengthening its damage and empowering the weapon's moves.

Momentum starts to deplete if you are out of combat and if you are hit by blue enemy attacks. The First Ascension condition will revert back to its Default state if your Momentum is below the second section of the Momentum Gauge.

NOTE: The input represents the status if the weapon type was equipped as the main weapon.

Dunecleaver First Ascension Combat Moves


Cleaving Dune Combo: Regular 4-Hit combo that ends in a lateral sweep.

  • Button Combination: ▢ + ▢ + ▢ + ▢

Pounding Dune Combo: Advanced 4-hit combo with high impact and area damage, ending with a powerful zone strike.

  • Button Combination: (HOLD) ▢ + ▢ + ▢ + ▢

Swift Dune Strike: Quick hammer hit available after a dodge roll or an air dash.

  • Button Combination: After Evading,  ▢

Cleaving Sand Slide: Powerful hammer jump strike to get out of sand sliding into combat.

  • Button Combination: During Sand Sliding ▢

Double Dune Strike: 2-time hammer strike with high impact, available after doing 2 or more hits from another weapon.

  • Button Combination: After two or more hits with another weapon + ▢

Two-Handed Dune Shatter: Earth-shaking attack which consumes the accumulated momentum.

  • Button Combination: L2 + R2

Cleaving Swirl: Powerful whirlwind that brings the character in the air while damaging all nearby enemies. Requires being grounded.

  • Button Combination: R2

Dune Fracture: Dive down from the skies with a devastating slam, damage increases based on how long you fall. Requires being airborne.

  • Button Combination: R2


State: Second Ascension

duncleaver second ascension weapons atlas fallen wiki guide 200px

This is the second and final Ascension state that is achieved by generating enough Momentum to reach the third section of your Momentum gauge.

Momentum starts to deplete if you are out of combat and if you are hit by blue enemy attacks. The Second Ascension condition will revert back to its First Ascension if your Momentum is below the third section of the Momentum Gauge.

NOTE: The input represents the status if the weapon type was equipped as the main weapon.

Dunecleaver Second Ascension Combat Moves


Cleaving Dune Combo: Regular 4-Hit combo that ends in a lateral sweep.

  • Button Combination: ▢ + ▢ + ▢ + ▢

Pounding Dune Combo: Advanced 4-hit combo with high impact and area damage, ending with a powerful zone strike.

  • Button Combination: (HOLD) ▢ + ▢ + ▢ + ▢

Swift Dune Strike: Quick hammer hit available after a dodge roll or an air dash.

  • Button Combination: After Evading,  ▢

Cleaving Sand Slide: Powerful hammer jump strike to get out of sand sliding into combat.

  • Button Combination: During Sand Sliding ▢

Double Dune Strike: 2-time hammer strike with high impact, available after doing 2 or more hits from another weapon.

  • Button Combination: After two or more hits with another weapon + ▢

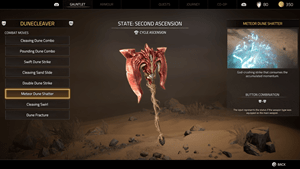
Meteor Dune Shatter: God-crushing strike that consumes the accumulated momentum.

  • Button Combination: L2 + R2

Cleaving Swirl: Powerful whirlwind that brings the character in the air while damaging all nearby enemies. Requires being grounded.

  • Button Combination: R2

Dune Fracture: Dive down from the skies with a devastating slam, damage increases based on how long you fall. Requires being airborne.

  • Button Combination: R2

Sandwhip Ascension and Combat Moves


State: Default

sandwhip default weapons atlas fallen wiki guide 200px

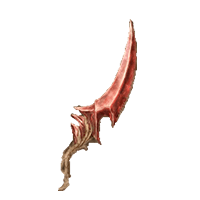
This is the default state of the Sandwhip weapon before Ascension. When you generate enough Momentum, your weapons grow in size and power, and your moveset transforms. This is known as Ascending.

NOTE: The input represents the status if the weapon type was equipped as the main weapon.

Sandwhip Default Combat Moves


Crescent Whip Combo: Long-range-3-hit combo finishing with a downwards vertical slash.

  • Button Combination: ▢ + ▢ + ▢

Sand Sting Combo: Short-range-3-hit dagger combo, the third hit will steal momentum from the enemy over time. Only available after performing a sword hook or after a counterattack.

  • Button Combination: ▢ + ▢ + ▢

Sandwhip Hook: Powerful move allowing you to propel yourself into a target.

  • Button Combination: (HOLD)  ▢

Sharpened Sand Spin: Small spin with the dagger, creating a small area of damage.

  • Button Combination: After evading ▢

Whipping Sand Slide: Long-range powerful whip vertical slash to get out of sand slide into combat.

  • Button Combination: During Sand Sliding ▢

Whip Backspin: Back dash whirlwind, creating a large area of damage and throwing you a few meters behind. Available with the same inputs as the Sword Hook during the dagger combo or immediately after a sword hook.

  • Button Combination: (HOLD)  ▢

Whip Shatter: Strong attack which consumes the accumulated momentum.

  • Button Combination: L2+R2

Sand Swirl: Powerful whirlwind that brings the character in the air while damaging all nearby enemies. Requires being grounded.

  • Button Combination: R2

Spinning Whip Fracture: Downward whirlwind damaging enemies as you fall, with a final slam on the ground. Requires being airborne.

  • Button Combination: R2


State: First Ascension

sandwhip first ascension weapons atlas fallen wiki guide 200px

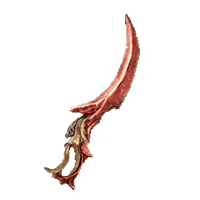
This is the First Ascension state. Generate enough Momentum during Combat to trigger the first Ascension state and your default weapon will evolve into this state, strengthening its damage and empowering the weapon's moves.

Momentum starts to deplete if you are out of combat and if you are hit by blue enemy attacks. The First Ascension condition will revert back to its Default state if your Momentum is below the second section of the Momentum Gauge.

NOTE: The input represents the status if the weapon type was equipped as the main weapon.

Sandwhip First Ascension Combat Moves


Crescent Whip Combo: Long-range-3-hit combo finishing with a downwards vertical slash.

  • Button Combination: ▢ + ▢ + ▢

Sand Sting Combo: Short-range-3-hit dagger combo, the third hit will steal momentum from the enemy over time. Only available after performing a sword hook or after a counterattack.

  • Button Combination: ▢ + ▢ + ▢

Sandwhip Hook: Powerful move allowing you to propel yourself into a target.

  • Button Combination: (HOLD)  ▢

Sharpened Sand Spin: Small spin with the dagger, creating a small area of damage.

  • Button Combination: After evading ▢

Whipping Sand Slide: Long-range powerful whip vertical slash to get out of sand slide into combat.

  • Button Combination: During Sand Sliding ▢

Whip Backspin: Back dash whirlwind, creating a large area of damage and throwing you a few meters behind. Available with the same inputs as the Sword Hook during the dagger combo or immediately after a sword hook.

  • Button Combination: (HOLD)  ▢

Sand Blade Shatter: Brutal strike which consumes accumulated momentum.

  • Button Combination: L2+R2

Sand Swirl: Powerful whirlwind that brings the character in the air while damaging all nearby enemies. Requires being grounded.

  • Button Combination: R2

Spinning Whip Fracture: Downward whirlwind damaging enemies as you fall, with a final slam on the ground. Requires being airborne.

  • Button Combination: R2


State: Second Ascension

sandwhip second ascension weapons atlas fallen wiki guide 200px

This is the second and final Ascension state that is achieved by generating enough Momentum to reach the third section of your Momentum gauge.

Momentum starts to deplete if you are out of combat and if you are hit by blue enemy attacks. The Second Ascension condition will revert back to its First Ascension if your Momentum is below the third section of the Momentum Gauge.

NOTE: The input represents the status if the weapon type was equipped as the main weapon.

Sandwhip Second Ascension Combat Moves


Crescent Whip Combo: Long-range-3-hit combo finishing with a downwards vertical slash.

  • Button Combination: ▢ + ▢ + ▢

Sand Sting Combo: Short-range-3-hit dagger combo, the third hit will steal momentum from the enemy over time. Only available after performing a sword hook or after a counterattack.

  • Button Combination: ▢ + ▢ + ▢

Sandwhip Hook: Powerful move allowing you to propel yourself into a target.

  • Button Combination: (HOLD)  ▢

Sharpened Sand Spin: Small spin with the dagger, creating a small area of damage.

  • Button Combination: After evading ▢

Whipping Sand Slide: Long-range powerful whip vertical slash to get out of sand slide into combat.

  • Button Combination: During Sand Sliding ▢

Whip Backspin: Back dash whirlwind, creating a large area of damage and throwing you a few meters behind. Available with the same inputs as the Sword Hook during the dagger combo or immediately after a sword hook.

  • Button Combination: (HOLD)  ▢

Storm Whip Shatter: World splitting strike which consumes the accumulated momentum.

  • Button Combination: L2+R2

Sand Swirl: Powerful whirlwind that brings the character in the air while damaging all nearby enemies. Requires being grounded.

  • Button Combination: R2

Spinning Whip Fracture: Downward whirlwind damaging enemies as you fall, with a final slam on the ground. Requires being airborne.

  • Button Combination: R2

Knuckledust Ascension and Combat Moves


State: Default

knuckledust default weapons atlas fallen wiki guide 200px

This is the default state of the Knuckledust weapon before Ascension. When you generate enough Momentum, your weapons grow in size and power, and your moveset transforms. This is known as Ascending.

NOTE: The input represents the status if the weapon type was equipped as the main weapon.

Knuckledust Default Combat Moves


Knuckle Strike Combo: Very short-range, high-speed, 4-hit combo of quick hits with giant sand fists.

  • Button Combination: ▢ + ▢ + ▢ + ▢

Powered Knuckle Dash: A long charge followed by a big leap towards the enemy, generating devastation damage.

  • Button Combination: (HOLD)  ▢

Striking Knuckle Jump: Huge jump punch creating a high amount of damage.

  • Button Combination: After evading ▢

Striking Sand Slide: Enormous double fist jump attack to end sand sliding into combat.

  • Button Combination: During Sand Sliding ▢

Brutal Knuckle Jump: Huge jump punch creating a high amount of damage.

  • Button Combination: After two or more hits with another weapon + ▢

Dust Shatter: Strong attack which consumes the accumulated momentum.

  • Button Combination: L2+R2

Knuckle Swirl: A powerful uppercut attack, placing you in the air after completion. Requires being grounded.

  • Button Combination: R2

Dust Fracture: A gigantic slam from the skies, causing more damage based on how high the attack is launched from. Requires being airborne.

  • Button Combination: R2


State: First Ascension

knuckledust first ascension weapons atlas fallen wiki guide 200px

This is the First Ascension state. Generate enough Momentum during Combat to trigger the first Ascension state and your default weapon will evolve, strengthening its damage and empowering the weapon's moves.

Momentum starts to deplete if you are out of combat and if you are hit by blue enemy attacks. The First Ascension condition will revert back to its Default state if your Momentum is below the second section of the Momentum Gauge.

NOTE: The input represents the status if the weapon type was equipped as the main weapon.

Knuckledust First Ascension Combat Moves


Knuckle Strike Combo: Very short-range, high-speed, 4-hit combo of quick hits with giant sand fists.

  • Button Combination: ▢ + ▢ + ▢ + ▢

Powered Knuckle Dash: A long charge followed by a big leap towards the enemy, generating devastation damage.

  • Button Combination: (HOLD)  ▢

Striking Knuckle Jump: Huge jump punch creating a high amount of damage.

  • Button Combination: After evading ▢

Striking Sand Slide: Enormous double fist jump attack to end sand sliding into combat.

  • Button Combination: During Sand Sliding ▢

Brutal Knuckle Jump: Huge jump punch creating a high amount of damage.

  • Button Combination: After two or more hits with another weapon + ▢

Sonic Dust Shatter: Unleashed barrage of attacks which consumes the accumulated momentum.

  • Button Combination: L2+R2

Knuckle Swirl: A powerful uppercut attack, placing you in the air after completion. Requires being grounded.

  • Button Combination: R2

Dust Fracture: A gigantic slam from the skies, causing more damage based on how high the attack is launched from. Requires being airborne.

  • Button Combination: R2


State: Second Ascension

knuckledust second ascension weapons atlas fallen wiki guide 200px

This is the second and final Ascension state that is achieved by generating enough Momentum to reach the third section of your Momentum gauge.

Momentum starts to deplete if you are out of combat and if you are hit by blue enemy attacks. The Second Ascension condition will revert back to its First Ascension if your Momentum is below the third section of the Momentum Gauge.

NOTE: The input represents the status if the weapon type was equipped as the main weapon.

Knuckledust Second Ascension Combat Moves


Knuckle Strike Combo: Very short-range, high-speed, 4-hit combo of quick hits with giant sand fists.

  • Button Combination: ▢ + ▢ + ▢ + ▢

Powered Knuckle Dash: A long charge followed by a big leap towards the enemy, generating devastation damage.

  • Button Combination: (HOLD)  ▢

Striking Knuckle Jump: Huge jump punch creating a high amount of damage.

  • Button Combination: After evading ▢

Striking Sand Slide: Enormous double fist jump attack to end sand sliding into combat.

  • Button Combination: During Sand Sliding ▢

Brutal Knuckle Jump: Huge jump punch creating a high amount of damage.

  • Button Combination: After two or more hits with another weapon + ▢

Thousand Strikes Shatter: Series of dimension-shattering attacks which consume the accumulated momentum.

  • Button Combination: L2+R2

Knuckle Swirl: A powerful uppercut attack, placing you in the air after completion. Requires being grounded.

  • Button Combination: R2

Dust Fracture: A gigantic slam from the skies, causing more damage based on how high the attack is launched from. Requires being airborne.

  • Button Combination: R2


Tired of anon posting? Register!
Load more
⇈ ⇈