Game Progress Route for Atlas Fallen features a condensed, basic step-by-step progression walkthrough for the main campaign of the game. By following this recommended route, its goal is to provide players the key points of the game and to avoid any missing important aspects such as significant Locations, quest or needed equipment. For a detailed walkthrough, players can find a more in-depth, detailed guide on each location and section of the campaign on the Walkthrough page.
Atlast Fallen Game Progress Route
The Essence Caravan: Tithe Caravan
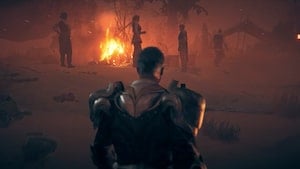
- Talk to Warden, Smith. and Herder 0/3
- Talk to Tracker
- Go after Morrath
The Prologue begins as the Tithe Caravan. This location has its own set of collectibles and Items. Start by speaking to each of the listed NPCs, Warden, Smith, and Herder who will be all at the camp. They will each be marked with a quest marker on your compass so that you can follow them to the objective location. After speaking with all of them, return to Tracker. Morrath with then arrive and will send you in a task outside the camp.
Wilderness
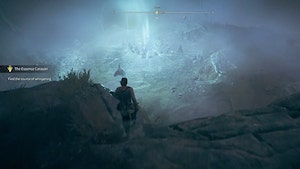
- Search the wilderness
- Find the thief
- Find the source of whispering
- Defeat the wraiths
- Find a way out of the pit
- Defeat the wraiths
- Climb up the rock wall
- Find the thief
- Return to camp
- Learn where Morrath went
- Reach the northern exit
- Find an armour to leave the camp
- Find Morrath
- Defeat the wraith
- Find the exit of the cave
- Escape from the cave
You will then change locations and you will have a new marker to follow. When you advance far enough you will start to hear a voice and your objective will update. Follow the voice. Continue using the compass to guide you and it will lead to a location with a light. Drop down to the bright light to begin a cutscene. You have just obtained the Gauntlet.
With the gauntlet, you are now introduced to a few Combat actions. Defeat the Wraiths that appear to continue. Once its clear, make your way out. Continue to clear the Wraiths as they appear. You will then need to climb a wall then continue searching for the thief, your original objective. You can explore the area while you're here, start to follow the marker on your compass and it will lead you to the thief. Once you find him, interact with him to retrieve the Artefact Morrath is looking for. Once you have it, return to Camp with the Momento. A cutscene will begin once you arrive at camp.
After the cutscene, you will need to find Morrath and the Gauntlet again. Speak to Tracker to find some clues then speak to the guard at the entrance to reach the Upper Camp. Speak to the Grave Digger here to ask about Morrath. He will be past the tents. You will then need to find an Armour to leave the camp. The Travelling Vendor will be there by the tents. Purchase the Recruit Garments from him and then equip it. Speak with the Caravan Guard to leave then continue to find Morrath. Another Combat encounter will begin against a Cloaker. The game will also introduce you to the Sandskin so you can practice parrying attacks. After you have cleared the area, find the exit. Follow the quest marker to locate the exit.
Away From the Sun's Eye

- Escape the Watcher
- Explore the Cave
This section begins mid-action, but will be a quick quest to finish. You will need to escape the Watcher while practicing Sand Sliding. Slide all the way down and steer clear of the obstacles as you slide. At the end of the slope, you will drop down into a cave and this will immediately trigger the next quest: A Way Out.
A Way Out

- Explore the Cave
- Investigate the Object
- Find the exit of the cave
You will then need to find a way out. Explore the cave. You will be taught about Anvils, how to raise them, and what you can do with them. Up ahead is the first Anvil. Raise the Anvil and you will complete 'Investigate the Object.' Now you only need to find the exit. You will still have an objective marker on your compass that you can follow. You can now use the Gauntlet to raise platforms and large objects from the sand. Use it on the platforms in the area to create higher paths. Clear any Wraiths in the area. Use the raised platforms to reach higher ground. To travel distances faster, use your sand sliding abilities. Search all corners, edges and cliffs to locate the Artefacts in the area. When you see an arch of rocks there should be a chest tucked away on the lower ground that will contain Preserved Spices (Rare). Once you have obtained it, you can now travel above the arch of rocks to reach the other side. Once you get across, there will be another chest by the wall. Open it to obtain Thick Skin. Use raise on the platform nearby and head to the next area where you can find Hurling Hammer in a chest on a wooden platform. Be careful of the Wraiths. Use your new active Essence Stones during this Combat encounter to try it out. Finally, raise the wooden platform and use it to get to the exit passage. Follow the tunnel all the way out to begin The Lost Anvils.
The Lost Anvils

- Raise the Anvil
- Awaken the anvil
- Find a piece to stabilise the gauntlet
Now that you are out at the desert, head towards the first desert anvil ahead. Follow the quest marker to reach the anvil. Sand Slide to travel faster. You will be able to see a glowing patch on the sand that will indicate an interactable area. Head west and there will be a patch on the ground. Raise it to reveal a chest. Continue toward the marker till you reach the Anvil. It will be next to another chest which will contain another Artefact. Raise the Anvil then allow the scene to play out. you will then be tasked to find a piece to stabilise the Gauntlet. The compass marker will lead you southeast. Beware of any stray Wraiths lurking in the sands. At this point, you will have learned how to Air Dash. There will be a large chasm you will need to use it toward the Northeast of your current location. Double Jump then Air Dash across the gap. Once you cross, descend the slope of sand. You will start to lose the connection with Nyaal's voice. Continue descending and the quest will end with a cutscene. The Path to Bastengar will begin.
Enhanced Dash Piece
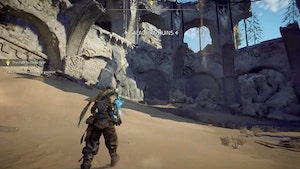
- Find a piece to stabilise the gauntlet
For this part of the story, follow the objective marker. This will lead you to the Caladrias Ruins. There will be a glowing spot in the middle of the ruins. You will need to clear a few Wraiths in the area before you can approach it. This is when you will learn how to use Shatter. A Mawer and a few more wraiths will appear so you can try it. After that, you can obtain the Enhanced Dash Piece. Nyaal will then introduce Nyaal's sense which you will need to activate in order to locate all the upgrade Shards for the next task.
Reforging the Gauntlet
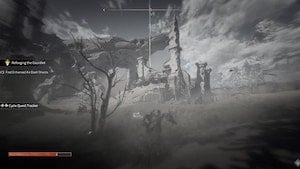
- Find Enhanced Dash Shards (3)
With Nyaal's Senses activated, the locations of all nearby shards will be visible. Look for the beams to reposition yourself and then head in each direction and follow them. You can follow any beam locations you see, but this guide will lead you to the Shard locations near, Castrum VII, Outskirts Forest, and the Vast Sands. If you get lost, activate Nyaal's senses to confirm your heading.
- One beam will lead you toward a settlement, Castrum VII. A chest ahead in front of Castrum VII will contain an Idol of Shatter. Castrum VII is the large guarded structure ahead. Before entering the area, circle around and search the walls and corners to loot a Griffon Figurine (Special) Artefact. Just south of it is the Outskirts Hazed Cave. There will be a glowing item, a Warded Relic protected by a spell. You will need to clear all the Wraiths in the area to clear the spell and access the item. Clear the Wraiths and the Diver then take the Shard. The second location is in the Outskirst Forest which will not be too far from Castrum VII to the south.
Outskirts Forest
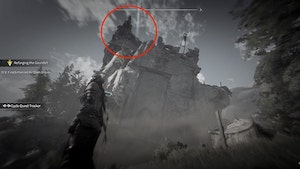
- Find Enhanced Dash Shards (3)
- Head towards the structure south of Castrum VII. You will need to platform your way up to reach it. You will need to climb a nearby structure to the north and dash your way across in order to reach the shard. You may be able to come across a Padlock (Common) as you search the area. Once you reach the top, there will be a shard for you to pick up and you will only need one more shard to upgrade the Gauntlet.
Vast Sands
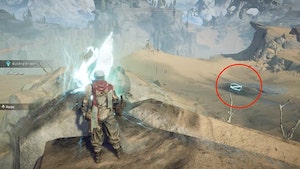
- Find Enhanced Dash Shards (3)
- Upgrade your Air Dash at an anvil
- Finally, head to the Vast Sands. This Shard will teach you about Sealing Totems. There will be a Sealing Totem nearby and a related Lore Item you can collect about them. You will need to raise the first Sealing Totem to activate the beam which will lead you to the next one. Once one is raised, quickly follow the beam since you will be given a short time limit to reach and raise the next totem in the sequence. Raise all Totems to complete it and you will be near the Shard in the vast Sands, which will be just below the final Sealing Totem in the sequence. As you approach the Shard upgrade, get ready to fight off a few more Wraiths. A Diver will appear. Clear the area then take the third shard to update your objective.
You can then travel to any Anvil to make the upgrade. Select Upgrade Gauntlet to view your available upgrades.
Shattered Keep
- Meet Arif in Castrum VII
- Retrieve the piece in the ruins
After making your upgrade, look for Arif in Castrum VII. Your Compass quest marker will lead you to him. Speak to him then he will pin another location for your next upgrade piece in the Shattered Keep. Sand Glide all the way to quicken your pace and you will be led to a Gorge that you need to cross. Raise the nearby Anvil before you cross, then use your newly upgraded Dash to jump the gap.
Once you cross and enter the Shattered Keep, clear any Wraiths you encounter. You will need to make your way in through the Shattered Keep Cathedral. This is past the cellars and the Researchers you may encounter. Head into the Cathedral, and check corners and edges for Chest and loot. Head deeper into the Cathedral and you will find the piece you're looking for, an Enhanced Raise Piece. This will be followed up with a Combat encounter against a Tailguarder and all approaching Wraiths. Clear this area and you will need to continue with Reforging the Gauntlet Part 2: Unearth, which tasks you to find the related Shards for the next upgrade.
Reforging the Gauntlet Part 2: Unearth

- Find Unearth Shards (3)
- The nearest Shard will still be in the same location within the Shattered Keep up on the roofs. You will need to find a route to platform up onto the Shattered Keep Roofs. Activate Nyaal's Senses to help direct you to the closest location. If you circle the area, you will find a few scaffolding platforms and planks that will stick out to give you a route to ascend upwards onto the roof. Follow the roof and the rampart paths and continue heading toward the Shard beam. It should be on top of a tower with a flag. Once you approach the shard location, there will be a Sealing Totem on top, sealing the shard. You will need to raise the first Sealing Totem and follow the beams within the time limit until you complete the sequence much like the Sealing Totems you encountered at the Vast Sands. Complete the sequence and quickly run across the roofs to raise all the totems. It will eventually lead you back to the shard. Raise the last totem and you will be able to access the upgrade Shard.
- Another Shard will be in the vicinity of the Shattered Keep on the Shattered Keep Plateau, south of the first Shard's location. Head towards the cliff edges while navigating the roofs to reach it. There will be more Wraiths in the area so be prepared. Use Raise to create a path for you or take you to higher ground. Activate Nyaal's sense if you need direction. Once you get to the plateau, look for a lower platform where you can start platforming and making your way up higher. Once you reach the cliffs, you should be able to pick up the second shard. There will also be a Lore Item, Old Memory, at the end of the cliff. Once you've picked up the Shard, activate Nyaal's senses again to locate the next nearby beam.
Outskirt Cliff Forest
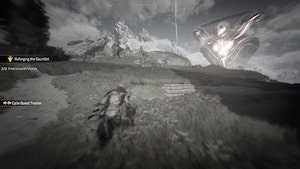
- Unearth Shard #3
- Upgrade your Raise at an anvil
- You will be led outside of the Shattered Keep. Exit the area and follow the next beam all the way through the Outskirt Cliff Forests. You may pass the Outskirt Bandit area where you can pick up Aftermath of the Battle. Head all the way across till you reach the Shard which is on a cliff overlooking Castrum VII. This will be sealed with another set of Sealing Totems. Raise the first one and quickly follow the activated beam and follow the sequence until all totems are raised. The final one will lead you close to the original location of the Shard. Once you have completed the Sealing Totem, return to the shard and retrieve it.
After you have all three shards, head to the Anvil of your choice for the next upgrade to progress. The closest one to this location is down at Castrum VII. Drop down the cliff and upgrade your Gauntlet to continue.
Castrum VII

- Speak to Arif
- Raise the village's gate
- Defeat the Marauder
- Unearth the Knights' Gate
If you used the Anvil at Castum VII, you can head straight to Arif who will also be at Castrum VII. You can now raise the village gate nearby. Wait for the cutscene to end then get ready to face the Marauder as your next task. Clear the Marauder and the Wraiths in the area to complete the objective then if you are done with the desert, complete the last objective, Unearth the Knights' Gate. Make sure you are done with the region including all Activities and Exploration, since you won't be able to return. Below are a list of all items and activities that can be completed in Caladrias: Forbidden Lands, before moving on to the next region and beginning the next quest: From Beliefs to Trust
- Do all Side Quests and Errands in this Location
- Find All Caladrias Wildlife Habitats x4
- Find all Caladrias Treasure Map Locations x6
- Complete all Caladrias Sealing Totems x7
- Defeat theCaladrias Watchtower x1
- Raise all Caladrias Anvils x12
- View all Caladrias Vantage Points x5
- Listen to All Caladrias Sand Echoes x3
- Do All Side Quests and Errands
- Collect all Lore Items in Caladrias x20
- Collect all Formulas in Caladrias x33
Bastengar's Underground

- Enter Bastengar
- Talk to Khendra
- Find the Entrance to the Sunken City of Lothville
- (Optional) Check on Arif in his Cell
- Find a way to the Sunken Palace
After the cutscene introducing Khendra, the commander, enter Bastengar and head to the War Room round table where she will be. Talk with her to continue. You will then be given another objective along with an optional objective. If you want to pursue the optional objective, head to the prisons across the bridge on the upper floors to look for Arif. Take the stairs just outside the entrance to the fort all the way up and you'll find the bridge. This will activate the extra Errands, Good or... Edible Food. Complete the errand to gain a Dark Silver Dye and Essence Dust.
When you are ready look for the entrance to the Sunken City. Follow the maker on your compass and sand slide down through the Cavern. There will be a Knight Guard you can speak to who will give you Piercing Parry. Head through the entryway to the next area. Slide down till you reach a gap and raise the platform then use it to hop up the next area. Drop down to the tunnel ahead and there will be a cell gate where the Sunken Passage entrance will be. Head through the gate and use Raise at the end. This will reveal the route to the Sunken Passage.
The Sunken City

- Look for Valery in the Sunken Palace
- Investigate the anvil
- Defeat the Spiker
- Collect the gauntlet Piece
- Find hints on Valery's wherabouts
- Investigate Valery's research camp
- Upgrade the Gauntlet
- Show proof to Khendra
- Free Arif from his cell
- Travel to Monsalar
Head into the Sunken City and look for a way to the Sunken Palace. You may need to clear a few Wraiths in your way. Follow your compass then dash across the broken bridge. Drop down onto the balcony to enter the Palace. There will be an Anvil in the middle of the room. Approach it with caution and get ready for Combat. A Spiker will appear. Clear the Wraiths and collect the Gauntlet piece at the anvil then investigate the area. You will need to find Valery's research journals which will begin a Side quest: Valery's Trail. You will also receive Deadeye's Attire when you complete the objective.
To learn about Valery, look for a circle marking on observable items. Observe a tool desk here in the main room then head behind using any entrance and there will be another crafting table covered in data notes and research. Investigate her desk and this will complete the objective. Once this objective is complete, the objective will update and you can upgrade the Gauntlet. Upgrade the Gauntlet at the Anvil in the middle of the room. With this upgrade, you can now dash 3 times. You can now exit the area. Head to the upper floors and clear the Shellbasher that will appear. Complete the Sealing Totem sequence on the second floor and it will lead you out. Make your way back to the broken bridge. You can now use your newly upgraded Dash to get back across.
Exit the area and return to Bastengar. Speak to Khendra to complete the objective and she will allow you to free Arif. He will be in his cell at the Prison. Head back to the upper floors across the bridge and look for Arif in his cell. When you are done with this area, head to The Wildlands Gate across the fort and travel to Monsalar.
Monsalar: The Wildslands
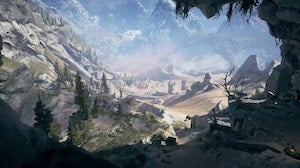
- Meet with Khendra
- Reach Lithesta
- Inform the High Priest of the threat
- Look for oil in the estate's upper rooms
- Light the fires at Thelos' shrines
- Return to the High Priest
- Return to the gates of Lithesta
- Defeat the Soarer
- Ask the guard to open the gates
Once you enter through the gate, speak with Khendra at the end of the passage, then make your way to Lithesta while following the directions on your compass. Speak to the City Guard there and he will tell you to Speak to the High Priest who will be at the Priest's Estate. The directions on your compass will be updated. Raise the next nearby Anvil and head to the Priest's Estate. Head up the stairs into the Priest's Estate. Take The Black Alms Lore Item on the bench to the left.
You'll need to fetch the oil in the upper rooms. Take it and then make your rounds around this Location to locate the fires at Thelos' Shrines. There will be three in the area. The shrines will be marked on your map. Light all three then return to the High Priest. After you've completed his task, you will be informed of the siege at the Gates of Lithesda. Return to Lithesda and get ready for combat. Clear the Wraiths and the Soarer. View their pages for additional Combat tips. Once you have cleared the entrance, speak to the City Guard again by the entrance. You can now enter the City of Lithesta.
The City of the Sun
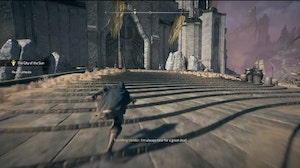
- Talk to Arif
- Ask Spire workers about the essence ritual (3)
- Meet with Graveller in the Lower City
- Follow the Mining Road to the Mining Village
- Ask the miners for a way into the mine
- Find a way up to the Watchtower
- Create a Path to the Watchtower
- Defeat the Dromur
- Enter the Mine
- Search the Mine for the Corruption's Source
- Discuss the Plan with Arif
- Enter the Absolution Spire
- Pick up Purified Sand to Enter the Kiln
- Dress as Unnamed and Enter the Kiln Room
- Throw the Artefact into Kiln
- Quickly Leave the Kiln Room
- Regroup with Arif
- Hurry to the Queens PalaceP
- Pick up Valery's Gauntlet Piece
- Return to the Wildlands of Monsalar
- Crush an Anchor Holding the sundial Chains
- Travel to Thelos' Citadel
Once you enter the city, look for Arif. Follow the location on your compass. Afterwards, you will need to enter the Spire where you can interact with 3 different Spire workers to ask them about the essence ritual. They will each be on different floors of the spire. Approach them and they will have a yellow quest marker on them along with a Spire Worker label so you know who to approach. After gathering information, it will lead you to meet with the Graveller in the Lower City. Head to the Lower City and follow the main path which will lead you to the Graveller. Interact with him then exit the City to look for the Mining Road to the Mining Village. The Mining Village will be all the way to the southern edge of the Map.
Follow the Road to the Mining Village and ask around for a way to the mine. There will be a few new Lore Items to collect in this Location. You'll need to speak to the Forewoman on the upper floors of the Mining Village. You will then need to find a way to the Watchtower. If you enter the haze, you will need to look for an odd glowing object. This will trigger the related Main Quest you need to proceed: A Bridge from the Past. Once you complete this Main quest, head back to raise the structure and that will create a path up to the Southern Watchtower. Clear the area of the various Wraiths and the Dromur. Completing this will start part 3 of this quest.
Clearing the tower opens up the mine for you to explore and retrieve the Corrupted Spark. Meet Arif and discuss the plan with him about creating a distraction. Follow his instructions by equipping the Unnamed Worker armour to blend in. Pick up sand to hide the Corrupted Spark, get past the guard thats guarding the kiln room, and deposit the Corrupted Urn into the Kiln causing it to explode. Make your escape and return to meet Arif only to find out he isnt there and Graveller is. Speak with him, and learn that Arif is at the Palace Throne room already. Head over there to meet Arif. Completing this will start part 4 of this quest.
From the cutscene, you will learn about Nyaal's prison and find Valerys body by a cliff. Pick up Valery's Gauntlet piece, head up the stairs and head back to The Wildlands. You can speak to Tracker about the Mining Village to gain the Side Quest Secure the Mining Village, You can speak to Khendra about Valery as well as the Mining Village. Following the Quest, you will need to locate and crush 5 anchors that are holding the Sundial. The chains are all located on the right side of The Wildlands map.
- One can be located on the top of the Prison Stairs, you can fast travel to the Anvil on the left of it just down the stairs.
- One can be located on Outer Reach's Ridge, slightly southest from the Anvil.
- One can be located on Northern Wastes, slightly northeast from the Anvil.
- One can be located on Sundial Road, far east from the Anvil to the right of the previous anchor.
- One can be located on Northern Ridge, farther east from the Anvil to the right of the previous anchor.
breaking the chains will cause the Sundial to collapse. Head onto the Sundial to trigger a cutscene and a fight with some Wraiths and a Conjurer. Defeat them to get through, use the collapsed sundial to cross onto the Black Alms road where you will meet the Odd Hunter. Go through the path behind him to begin The Battle of Gods
A Bridge from the Past
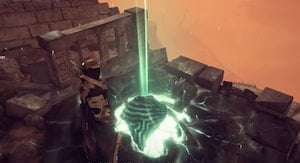
- Ask about the hunter who knows the area
- Talk to the odd hunter
- Find the Reveal Shards (3)
- Upgrade your Unearth power
Head to the Hunters camp which will be north of the Mining Village along the Mining Road. You might have passed it on the way to the Mining Village on the way south. Look for the Head Huntress at the village and speak to her and she will lead you to the Odd Hunter will be at the Southern Wastes. Follow the next compass marker to look for the Odd Hunter's camp. Speak to him. He will give you the Refined Raise Piece.
After obtaining this piece, you will need 3 more upgrade Shards to upgrade your Gauntlet. One will be just below your current location.
- Drop down and use Raise on the glowing sand until the Shard is revealed. Activate Nyaal's Senses if you need direction.
- Activate Nyaal's Senses to lead you to the next shard. One will be at the Western Ridge Northwest. You may encounter a few Wraiths on your way. it will be up on the tower. From another tower across, use dash to the next one south. If you see the shard it will be sealed by a Sealing Totems. Raise all Sealing Totems in time, till you reach the last one. It will lead you to the Shard's original location. Raise the final totem to unseal the Shard and collect it.
- From the second shard location, activate Nyaal's Senses to reveal the beam direction and it should lead you south. Clear the Spiker and all appearing Wraiths in the area. Once you have cleared the Combat interaction, the shard will be free for the taking.
Once you have a total of 3 shards, locate any Anvil then upgrade your Gauntlet there to progress.
The Power to Reach Thelos
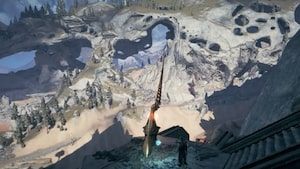
- Find Crush Shards (3)
- Search Wildlands for Shards
- Revisit Bastengar's Undergrounds for Shards
Follow the marker to the first and only shard you can find in The Wildlands, you can find it by entering the Roadside Temple. Make your way up the stairs by the arche bridge on the Western Ridge into the temple. Go up the stairs on the right and follow the walkway to a sealed door. Crush the seal, head down the stairs and you will find the first shard. Follow the marker for the next 2 shards to Bastengar's Underground. The 2 shards can both be found in caves that are behind a sealed gate in the Sunken City of Lothville. Fast travel to the Anvil in the Sunken City, one of the cave entrances is on the right side covered by the cliffs. A tall structure can be seen leaning towards the right and a Tailwhipper nearby. You can jump on the roof of the broken down houses and make your way across to the cave entrance. break the seal and raise objects in the sand to search for the shard. The last shard can be found in a cave near the bridge, look up to find a small cliff with a bright glow. Get to a high enough platform to make the long jump across. Break the seal and the shard will be seen.
Head to an Anvil to upgrade the gauntlet and you will receive Enhanced Crush. Follow the marker to the Main Quest The City of the Sun.
The Black Alms: Citadel
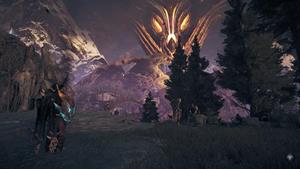
- Find your allies in the Black Alms
- Open the Gate to the Swamp Ruins
- Find the Energy Source in the Swamp Ruins
- Defeat the Source's Guardians
- Crush the Energy Source in the Swamp Ruins
- Climb to the Top of the Ruins
- Defeat the Sources Guardians
- Crush the Energy Source in the Ruins
- Crush Thelos' shrine
- Defeat Morrath, Champion of Thelos
When you reach the Black Alms, head down the hill and you will see the Knight's Camp. You can find Khendra and Tracker there. After speaking with Khendra, this will lead you to your next objective to crush the Energy Sources. One can be found in the Ruins while the other one can be found in the Swamp Ruins.
The Swamp Ruins can be located to the far right side of the Essence Wastes. To open the gate to the Swamp Ruins, you will have to raise and complete the Sealing Totem found in front of the sealed gate. Entering the Swamp Ruins will activate the A Source in the Swamp Main Quest. Head deeper into the Swamp Ruins and you'll end up in the Caves, go deeper in and you will find the Cave Temple entrance. When you reach the Cave Temple, you'll find a sealed door. You will have to defeat some Wraiths and a Shellbasher before being able to crush the seal and getting through to the Energy Source. However before crushing it, you will have to defeat 2 waves of Wraiths of different Levels. Once successful, go ahead and crush the energy source. Return to Essence Waste and head to the Ruins for the second energy source. This completes A Source in the Swamp.
The Ruins can be located on the far right side of the Essence Wastes. In front of the entrance to the Ruins, there will be some Lesser Wraiths and a Conjurer that you will have to defeat before passing though. Once defeated, you can make your way through the Ruins. To get to the top of the ruins, you will have to utilise the Forgotten Paths to get to cliffs thats farther away. Once you reach the Ruins Temple, you will have to clear 3 waves of Wraiths of different levels. Successfully clearing the waves will allow players to crush the energy source. Return to the Knight Camp and report to Khendra. This completes A Source in the Ruins.
Follow the marker and speak to Khendra, this triggers a funeral for Valery. Once complete, head to the Citadel for your final fight with Thelos. He will use Morrath as his Vessel to fight you. When you've successfully defeat him, a cutscene will show Nyaal finally free and your character breaking Thalos' Shrine. This completes The Battle of Gods.

because of the flashing ad's and the inability to read with all the noise, I decided to go elsewhere for what I was looking for.
0
+10
-1