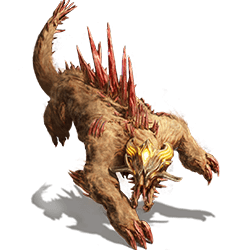
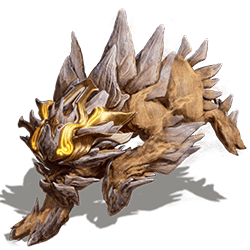
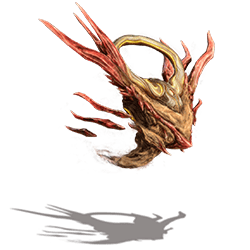
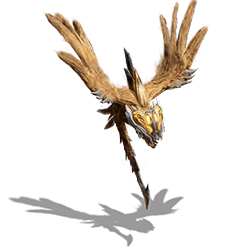
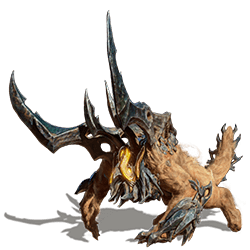
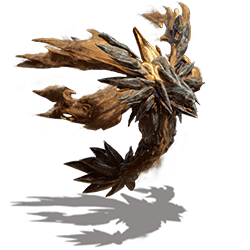
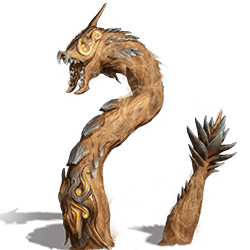
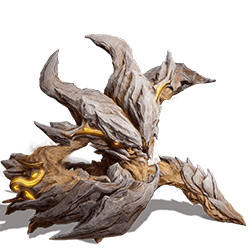
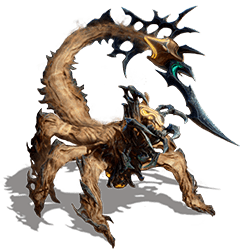
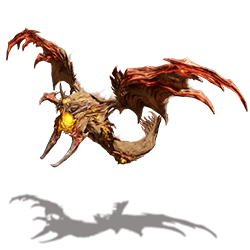
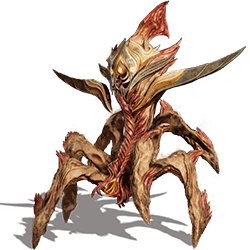
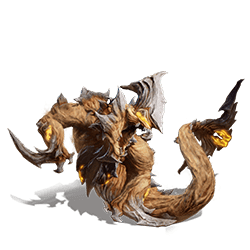
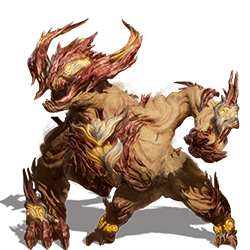
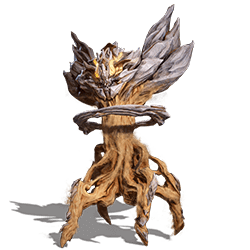
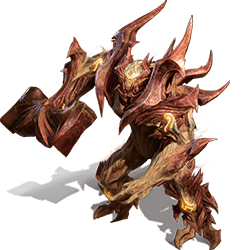
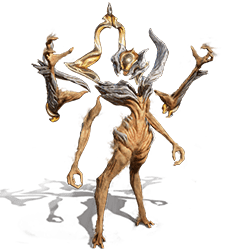
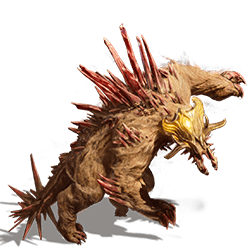
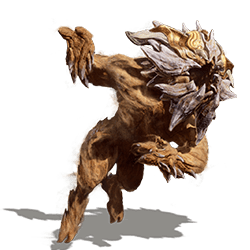
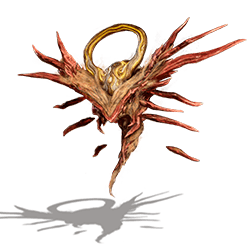
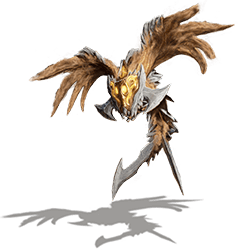
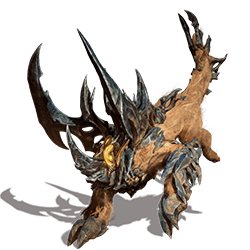
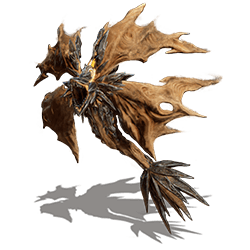
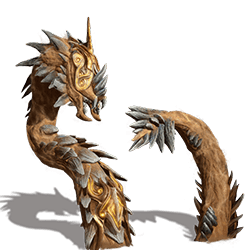
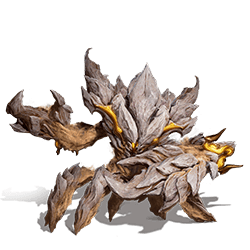
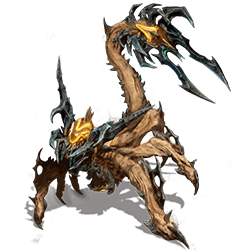
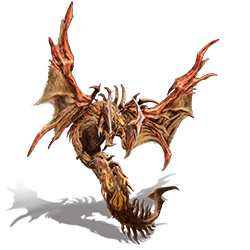
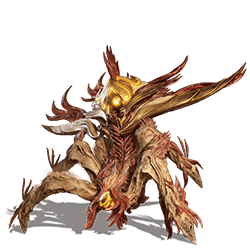
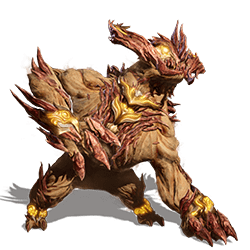
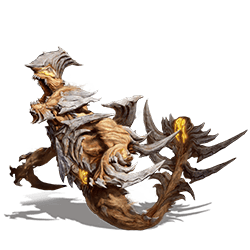
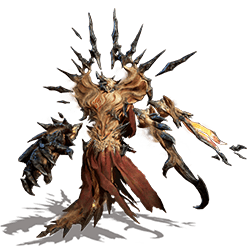
Wraiths in Atlas Fallen are the hostile creatures, characters, and beasts that have been described as legendary creatures known as Sand Wraiths encountered throughout the game which are also made of sand as their name suggests. The gods' guardians can be found lurking in the sands of Atlas Fallen. These include the smaller generic encounters and are different from the larger Boss encounters. Find out about all types of hostile Wraiths and encounters, their stats, strength, weaknesses, Wraith drops, and best ways to counter them below. For specific Boss encounters and larger battles, view the Bosses page which also covers each of the available known Boss fights, their strength and weaknesses and how to find fight them.
Atlas Fallen Wraiths Quick Navigation
Click to jump to a specific section of the page
All Wraiths in Atlas Fallen
Atlas Fallen All Wraiths Gallery
All Regular Wraiths in Atlas Fallen
All Elite Wraiths in Atlas Fallen
Atlas Fallen All Wraiths List View
Wraiths by Type
Lesser Wraiths
Greater Wraiths
Colossal Wraiths
Wraiths by Category
Atlas Fallen All Wraiths Table View
Quick Search of All Wraiths in Atlas Fallen
Click the header to sort the table.
Name |
Location |
Drops |
Strategy |
|---|---|---|---|
Mawer |
When facing Mawers it is key to watch out for their momentum inhaling attack as it will lead to them linking their strength. Overwhelming the Mawer with heavy-hitting attacks can interrupt the process. When a linked Mawer is killed the remaining one will be crystallised. | ||
Cloaker |
A Cloaker always turns visible when attacking, but quickly hides again right after. A Cloaker is hard to spot when hiding and it does not expect to be attacked then. Attacks with a wide area of effect are the best choice when facing Cloakers. | ||
Gazer |
Approaching a Gazer asks for a certain mastery of aerial mobility as it will seek to keep its distance. Once closed in the Gazer can be quickly overwhelmed and defeated but should not be left unattended after death as it will charge towards its target in a final attempt to crush it. | ||
Stinger |
Carefully performing Sandskin to protect against the sting attack will leave the Stinger vulnerable for a long duration. | ||
Hurler |
The shield of the Hurler that protects it from incoming attacks from the front can be broken using Sandskin or more powerful attacks with high impact. When not shielded the Hurler is a vulnerable target and can be overwhelmed quickly. | ||
Mender |
Due to the increased defence and constant healing of the Wraith it is attached to, it is crucial to cut off the source of healing first. Killing the Mender first means battling next against an enemy that has lost its healer. | ||
Diver |
Right before the Diver emerges from the ground, a cloud of moving sand can be seen that reveals its exact position under the surface. A well-placed slam to the ground can actually ripple through the Diver and pops it out of the sand in a crystallised state. | ||
Shellbasher |
The rhythm of the Shellbasher's claw attacks can be used against the Wraith by using Sandskin repeatedly to quickly turn its force to crystallise it. A well-thought evasive move on its forehead slam can bring the Shellbasher out of balance and open an additional window of opportunity. | ||
Spiker |
The Spiker is able to shake off all build-ups of crystallising very fast. Repeatedly use Sandskin during a single attack combination of Skorpur to leave it vulnerable. Attacks from its tongue need to be avoided to prevent its life-leaching effect. | ||
Tailwhipper |
Mastering aerial mobility and aerial combat is key to being able to approach and stay close to the Tailwhipper in the air. Sticking close to it in the air will leave the Tailwhipper unable to use its hazardous ranged attacks and will open windows of opportunity to land some hits. | ||
Scatterer |
The mines on the field can be utilised to turn against the Scatterer or other Wraiths. Attacking them will push the mines forward and throws them towards any Wraith in their path. Upon impact, the explosion will leave the Wraith vulnerable for a short time. |
||
Tailguarder |
When a Tailguarder is approached, constant movement is the key to avoid its energy beams. And approaching fast while a tracking beam is active will even open opportunities to attack its vicious tail. Sandskin or well-timed evasive moves creates additional windows of opportunity. | ||
Marauder |
The main threat of the Marauder is its claws. Countering them with well-timed Sandskin creates additional windows of opportunity. When it jumps up in the air to crash down on its foe, retreating to a safe distance and staying in the air while the ground impact happens is the best option. | ||
Heaver |
Destroying all Orbs will leave the Heaver completely defenceless. Whilst performing the overload attack, the Orbs are not only in their most dangerous state, but the Heaver is also most vulnerable to incoming damage. | ||
Soarer |
When the Soarer enters its frenzied phase it is not only much faster, more aggressive and deals more damage, but is also extremely vulnerable to incoming hits as its defences are lowered. | ||
Conjurer |
Each Lesser Wraith summoned around the Conjurer is both bound to its shield and to a ranged attack that will be empowered on defeating the summon. Defeating all Lesser Wraiths will disperse the shield of the Conjurer and allows you to concentrate all attacks towards the Conjurer itself. | ||
Devorur |
To prevent Devorur from absorbing its weaker siblings and becoming even stronger in the process, the Mawers around it need to be targeted first. If it has already empowered itself, it is wise to keep some distance and use long-range attacks or use Sandskin repeatedly to crystallise it. | ||
Veilur |
Attacks with a wide area of effect and long-range are recommended to catch Veilur off-guard. Similar to normal Cloakers, it is weak to being attacked while hiding from plain sight. Caution is advised when dealing with this Wraith due to its unpredictable movement. | ||
Orbitur |
|
Approaching Orbitur asks for mastery of aerial mobility as it will aim to keep its distance and will leave sand clones along the way. Once closed in, the sand clones need to be quickly overwhelmed and dealt with before dealing with Orbitur itself. | |
Scrimmur |
Carefully performing Sandskin to protect against the sting attack will leave Scrimmur vulnerable. On impact with the Sandskin, Scrimmur’s sand clones will be pulverised into dust. | ||
Gashur |
The shield of Gashur that protects it from incoming attacks from the front can be broken using Sandskin or more powerful attacks with high impact. When not shielded the Gashur is most vulnerable and can be overwhelmed, but it is also able to bring back its shield. | ||
Novur |
While being shielded Novur is not paying attention to the Scatterer it is attached to. In order to destroy the shield early, the Scatterer should be the primary target. The unshielded Novur is a vulnerable and fragile target. | ||
Coylur |
Right before Coylur emerges from the ground, a cloud of moving sand can be seen that reveals its exact position under the surface. A well-placed slam to the ground can pop it out of the sand in a crystallised state. Staying airborne avoids getting trapped in its Quicksand areas. | ||
Dromur |
The rhythm of the Dromur's claw attacks can be used against the Wraith by using Sandskin repeatedly to quickly turn its force to crystallise it. A well-thought evasive move on its forehead slam can bring Dromur out of balance and open an additional window of opportunity. | ||
Skorpur |
Skorpur is able to shake off all build-ups of crystallising very fast. Repeatedly use Sandskin during a single attack combination of Skorpur to leave it vulnerable. Attacks from its tongue need to be avoided to prevent its life-leaching effect. | ||
Skorchur |
Mastering aerial mobility and aerial combat is key to be able to approach and stay close to Skorchur in air. A part of its ranged attacks have evolved into momentum drainers, but by using Sandskin on the right attacks it will crystalise the Wraith for an increased duration. | ||
Echur |
Echur's sand clones pulverise on impact with Sandskin, which interrupts the anticipated deployment of decoy mines. Against Echur, not all mines on the field are the same. Decoy mines are fragile and detonate immediately upon being hit. | ||
Fractur |
Countering with Sandskin will not only create additional windows of opportunity on Fractur itself but will also pulverise its sand clones. When it jumps up in the air to crash down on its foe retreating to a safe distance and staying in the air while the ground impact happens is the best option. | ||
Fiur |
When Fiur is approached, constant movement is the key to avoiding its energy beams. And approaching fast while a tracking beam is active will even open opportunities to attack its vicious tail. Staying airborne avoids getting trapped in its Quicksand areas. | ||
Thelos' Champion |
|
|
The broad arsenal of Thelos' Champion requires always being wary of the surroundings. The lesser Wraith needs to be watched out for at any time. A well-timed use of Sandskin can help against incoming projectiles during its special attack in which the ground itself becomes a hazard. |
Wraiths Guide in Atlas Fallen
Wraith Weak Points in Atlas Fallen
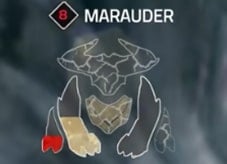
You'll encounter formidable and sizable Wraiths, each with multiple body parts for you to target and dismantle. Important information about their body parts, including their health and condition, is conveniently displayed below. This useful overview provides a diagram of the foe, highlighting their weak points, and offering insights into their vulnerabilities throughout the encounter. Keeping an eye on this visual aid will prove crucial in devising effective strategies and maximizing your chances of success against these imposing adversaries. So, prepare for thrilling battles, analyze your foe's weak points, and triumph by strategically targeting and dismantling their various body parts during your encounters.
Wraith's Level in Atlas Fallen
You may encounter foes whose level surpasses your current Power level. When this happens, the number indicating their level will be displayed in red, serving as a clear warning that the upcoming battle will be more challenging. This visual cue is a valuable indicator for players, signaling that facing a higher-level foe may require careful preparation, enhanced tactics, and the use of all available skills and resources. So, keep an eye out for the red level indicator.
.jpg)
What do Wraiths Drop in Atlas Fallen?
Each Wraith has its own special loot to offer, such as Essence Stones and Materials. Essence Stones are unique and will only drop once, meaning once you acquire one, you won't find another of the same kind from the same foe. For instance, if you defeat a Mawer Wraith, it will likely drop a Residual Energy Essence Stone, and after obtaining it, you won't receive another one from that same Mawer Wraith. On the other hand, when it comes to Materials, things work differently.

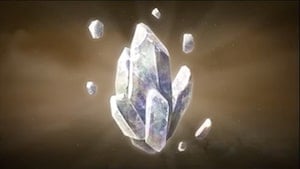
Defeating specific kinds of wraiths will always yield specific materials as loot. So, you can continuously gather materials by taking down different types of wraiths that drop the specific materials you seek. Keep an eye out for the unique drops each foe offers, and carefully choose your battles to collect the valuable Essence Stones and Materials needed for your adventure in the game.
Can you avoid fighting Wraiths?
In the midst of combat in the open world of Atlas Fallen, you have the option to decide whether to engage with the Wraiths you encounter or simply ignore them and continue your journey. However, certain situations, like quests or challenges, may demand that you face these foes head-on. In some quests, you might find yourself trapped with no alternative but to defeat the spawned Wraiths to progress. Additionally, "The Watcher's Fury" is a formidable gauntlet, where you're teleported and faced with multiple Wraiths that you must survive and conquer to successfully complete the challenge.
What is the Watcher's Fury in Atlas Fallen?
In Atlas Fallen, a thrilling event called Watcher's Fury can occur at random moments. When it happens, you'll notice your screen brightening, and suddenly, your character finds themselves in an enthralling yet treacherous dimension. In this challenging situation, you have two options: either escape the grasp of the Watcher or face the spawned Wraiths head-on and defeat them all. Should you manage to survive this intense encounter, you'll be rewarded with valuable loot. Among the drops, you'll discover Tainted plants, which play a crucial role in fusing Cursed Essence Stones, and minerals acquired from the defeated Wraiths. So, be ready to experience random encounters with Watcher's Fury, and test your skills and resilience to reap the rewards.
Wraith Body Parts in Atlas Fallen
Most body parts you encounter have shiny metallic pieces on them, known as Catalyst pieces. These are marked in red, and destroying them all defeats your Foe. In the heat of battle, breaking enemy parts or targeting their weak points can yield two contrasting effects for Wraiths. On one hand, it renders them vulnerable, opening up opportunities for additional damage and potential advantage for the player. However, on the other hand, this act also triggers an Enraged state in the Wraiths, causing them to become more powerful and aggressive in their attacks and behavior.
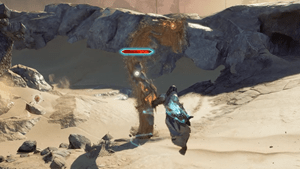
This strategic element adds a layer of complexity to combat encounters, as players must carefully weigh the risks and rewards of targeting specific enemy points. Mastering the art of identifying weak points and timing attacks becomes essential in navigating through the challenges that the Wraiths present in the game. It is also important to take note that only Greater and Colossal Wraiths are the only ones with breakable body parts.
What are Wraiths in Atlas Fallen?
In Atlas Fallen, players will come across a formidable array of enemies known as Sand Wraiths, who roam the vast and sprawling sands. These Sand Wraiths come in diverse forms, ranging from fearsome creatures to cunning foes, and they pose a significant challenge for players to overcome. Engaging in intense battles with these formidable opponents is a crucial part of the game's experience, as players must skillfully strategize and employ their combat prowess to defeat these Sand Wraiths.
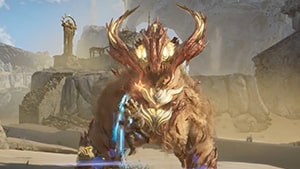
Only through their triumph in combat can these formidable foes be vanquished, transforming them back into the very sand from which they emerged. Prepare to face an array of Sand Wraiths, each presenting unique strengths and weaknesses, as you embark on an epic journey to prove yourself as a skilled and fearless adventurer in the ever-enthralling world of Atlas Fallen.
Regular and Elite Wraiths in Atlas Fallen
In the enchanting world of Atlas Fallen, Regular Wraiths are the most frequent foes you'll come across. These common enemies can appear in various locations throughout the game's vast world, making them a regular challenge for players to face. On the other hand, Elite Wraiths present a much greater threat, being significantly stronger opponents. Encountering Elite Wraiths is a rare occurrence, and they only appear once during your journey. Once defeated, they will not respawn, making each encounter with an Elite Wraith a unique and momentous event.
What are Watchtowers in Atlas Fallen?
The mechanics of Watchtowers in Atlas Fallen are quite fascinating. Each Watchtower is guarded by a group of Wraiths, and to dismantle the Watchtower and free the area from the haze that obscures it, you'll need to target and defeat a specific designated Wraith. By accomplishing this, the Watchtower will crumble, and the dense haze that shrouded the surroundings will dissipate, granting you clearer visibility and a newfound sense of clarity. Not only will this benefit you as an explorer, but the liberated environment will also allow the wildlife to roam freely once more.

